Showing posts with label Web Application. Show all posts

Monday, September 28, 2020

Cypress: How to handle browser-based authentication pop up dialog in Cypress

Five years ago I have written a blog on how to handle browser-based authentication for selenium webdriver.


Now it is for cypress.


Cypress has come with a very easy solution.


A very simple syntax to handle the browser-based authentication,

If we have a username and password and the URL then the cypress command will be 


cy.visit(app_URL, {auth:{username:appUserName, password: appPassword}})


For example, we have

username : abc

password : abc123

URL : xyz.com


Then cypress command will be


cy.visit('https://www.xyz.com', {

auth: {

        username: abc,

        password: abc123

      }

})


There is an alternative way that cypress suggested,


cy.visit(http://username:password@domainName.com)


Note that we have a special character colon “:” between username and password.


For the above example,


Cypress command will be,


cy.visit('https://abc:abc123@www.xyz.com')


That’s all for now. We will discuss more on cypress in my future post.

Thank you. 

Happy automation testing with Cypress!

Saturday, September 12, 2020

Cypress: How to test a web application using Cypress

In the previous posts, we have discussed various features of cypress and the installation procedure. 

Here we will see how a sample test can be written and execute the test using a  cypress test runner.


Test case: Search with the text cypress on Google.


Steps:

  1. Go to Google.com

  2. Type the text ‘cypress’

  3. Click on the Search button

  4. Verify the text “JavaScript End to End Testing Framework | cypress.io”


Now start automating the script.


Create a project structure: 

  1. Open the folder using the visual studio code that I have created in my last post in order

to install the cypress application. Note that I am using visual studio code as the editor for scripting.
You can use any editor that you feel comfortable with.

  1. Go to Terminal->New Terminal to open a new terminal.


  1. Type the following command to create a new project structure.

npx cypress open


  1. It will create a cypress project structure. 


  1. Click the OK button and the project structure has been created 

  2. Cypress Test runner window is now opened and click the close button to close the window.

  3. The project structure looks like the following.


  1. Now expand the cypress folder and see the structure.


  1. There are four folders.

    1. fixtures: All the test data files are there,

    2. Integration: All the test scripts are there.

    3. Plugins: cypress plugins are there.

    4. Support: all the customized commands are there.

    I will discuss the project structure in a separate post.


Writing Test:

Now come to write the cypress test. 

  1. Expand the Integration folder and note that a folder named “examples” are displayed.


  1. Now delete that folder as it has some sample scripts and it is not needed now.

  2. create a new test file name cypress_test.spec.js


  1. Write the following script 


Note that we use describe..it blocks. As cypress is using mocha by default, it uses this block.

cy.visit() : to visit a page 

cy.get(): for getting element location or searching an element

cy.get().click() : to click an element

cy.contains(): to check the text available on the page.


We will discuss more details on cypress API in later posts.


  1. Save the file.


Run the test using TestRunner:

  1. Open a terminal window

  2. Type the following command in the terminal.

npx cypress open


  1. It will open the Cypress test runner.


Now click on the cypress_test.spec.js file and it will start running.


Run the test in the terminal:

  1. If you want to run the cypress test in terminal, then just open the terminal and type the following

command:

npx cypress run


  1. The test will start running in headless mode and display the result.


That’s all for now. We will discuss more on cypress in my future post.

Thank you. 

Happy automation testing with Cypress!

Thursday, July 14, 2016

Protractor : How to generate single report for test suites

In order to generate aggregate reports we need to use consolidate option.

We will use our Suite projects that was develop through our post on how to implement suites in protractor.
We implement consolidate option on config.js file here.

Step 1 : Open the project and implement protractor-jasmine2-html-reporter package by using this post.

Step 2 : Open config.js file and write the following script and implement onPrepare() function.

image

Note that all the codes of onPrepare() function comes from the previous post except consolidate option. We make consolidate as true.

Step 3 : After running the script we see separate suite names at the report and all the suites reports are generate in a single html file.

image

Step 4 : If we make consolidate as false and run the script we see reports are generated in two separate files for two suites.

image

After running script,

image

We see reports for only one suite.

image

Step 5 : Now add another option consolidateAll and make it true.

image

After running the script we see all the suite report in a single file.

image

That’s all for now.

Happy end to end testing using Protractor!!!

Friday, June 10, 2016

Protractor : How to implement HTML report in Protractor

In our last post we have seen that how we can generate XML report using XML reporter. Here we see how we can implement Jasmine HTML reporters.

In this post we will use our sample projects that was built in our previous post.

Step 1 : Open the project.

Step 2 :  Open Terminal window and install protractor-jasmine2-html-reporter package using the following command.

npm install protractor-jasmine2-html-reporter --save-dev

image

It installs the following packages

image

Step 3 : Now open config.js file and the following variable for Jasmine2HtmlReporter

var Jasmine2HtmlReporter = require('protractor-jasmine2-html-reporter');

Write the following script in onPrepare() function,

image

Here,

jasmine.getEnv().addReporter(): It create report after executing the script.

Jasmine2HtmlReporter() : It generate HTML report.

savePath: Report folder where report is generated. User can define his own path.

Step 4 : Now config.js file will look like the following,

image

Step 5 : Now open terminal window and run selenium server.

image

Step 6 : Open another terminal window and run the script.

image

Step 7 : Note that script executes and report file is created at ‘reports’ folder.

image

Now double click on the htmlReport.html file and see the result. You can also open it through a browser.

image

image

Clicking on right side screenshot image you will see the screenshot in browser.

That’s all for now.

In the next post we will see how we can generate HTML report with different options.

Happy end to end testing using Protractor!!!

Wednesday, May 25, 2016

Protractor : How to implement suites in protractor

We write many scripts in order to automate functional or regression test cases using protractor but all are scattered and not in order. Sometimes we need to run a group of test cases dedicated to test a specific functionality. In that case we need to group protractor script named suite. Using suite we can make a set of scripts.

In this post we will use our sample projects that was built in our previous post.

Step 1 : Open the project and add two new folders named “addition” and “multiplication” by right clicking on project name and go to New->Directory.

image

image

Step 2 : Add a JavaScript file names “testadd1.js” at “addition” folder by right clicking on folder and go New->JavaScript File.

image

image

Now add another file named “testadd2.js”.

image

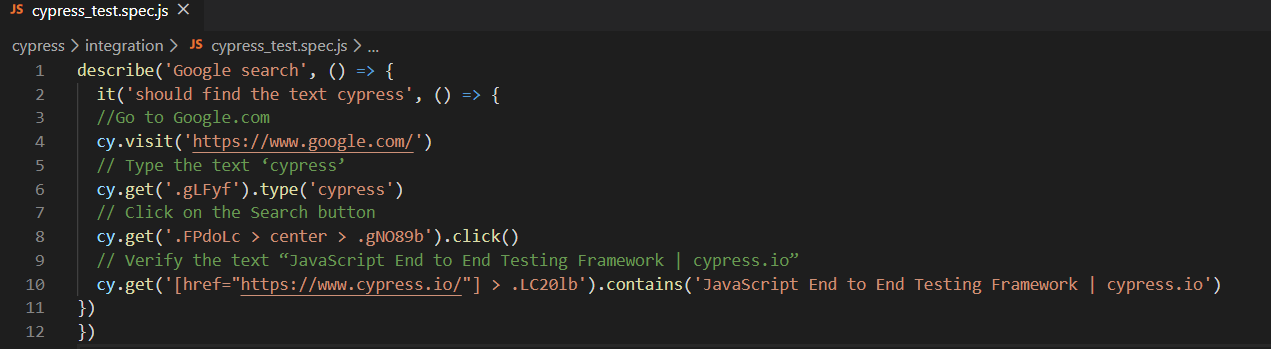
Step 3 : Now open testadd1.js and add the following script.

image

Open testadd2.js and add the following script.

image

Step 4 : In the same way, add two JS files “testmul1.js” and testmul2.js” on multiplication folder.

image 

Step 5 : Open “testmul1.js” file and add the following scripts.

image

And Open “testmul2.js” file and add the following scripts,

image

Step 6 : Now open conf.js file and add suites options like the following,

image

Here, addition and multiplication are suites name and we use these name during running scripts.

'addition/*.js' means run all .js files located in addition folder.

'multiplication/*.js' means run all .js files located in multiplication folder.

In this way we can run either any of the suites.

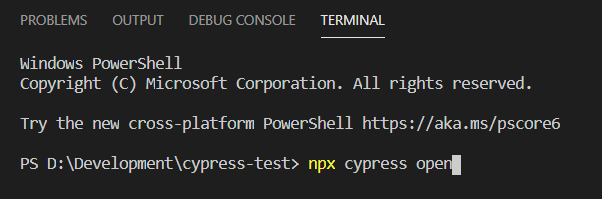
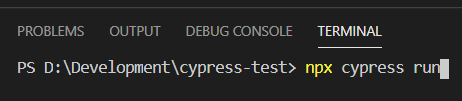
Step 7 : Now open terminal window and run selenium server.

[image71.png] 

Step 8 : Now open another terminal window and run all the script located in addition folder by using addition suite. The command will be

protractor conf.js --suite addition

image

Common format of this command,

protractor conf.js –suite {suite name}

Pressing enter key will run the script located in addition folder. Please do not merge folder name and suite name. These two are different.

You can run any suite by using the suite name.

Now run the multiplication suite.

image

We can create more suites by using different files from different folders like the following,

cal: ['addition/*.js','multiplication/*.js']

image

Here we use different script location separated by comma.

Now run the suite,

image

That’s all for now.

We will see more in future.

Happy end to end testing using Protractor!!!

Sunday, May 1, 2016

Protractor : How to maximize browser window using protractor

In our post on How to automate AngularJS application using protractor we see that browser window is not maximized.

Sometimes we need to maximize our browser window at the time of automation. Protractor has given us a nice command to execute such instruction.

In protractor we write script in our conf.js file using onPrepare  function. 

The script will be,

browser.manage().window().maximize();

In our example we use our project that we develop for one of our previous post.

Step 1 : Open the project and open conf.js file and write the above code in onPrepare function like the following.

image

Note that onPrepare is a function that fires at the time of executing script. So when browser window opens and it first maximize its browser window and then start navigate to the url.

Step 2 : Now conf.js file look like the following.

image

Step 3 : Run selenium server and then run the script using the following command.

image

image

Note that when browser window opens it first shows a relatively smaller window and then it become maximize to show full screen.

That’s all for now. More new things are coming.

Wish you a happy e2e testing!!!

Sunday, April 24, 2016

Protractor : How to run protractor script in different browsers

In our last post we have seen on how we can start our selenium standalone server using gulp. In order to perform cross browser testing it is needed to run our protractor script in different browser. Here we will see how we can do that by running our protractor script in different browser.

Protractor support four major browsers (Chrome, Firefox, IE and Safari).

If we use conf.js file to run our protractor script then we need to add Selenium capabilities object to our conf.js file.

image

Here capabilities is a json object to add browser name. Note that we have to change the browser name here to run our protractor script to our desired browser. If we use ‘chrome’ in place of ‘firefox’ then it starts running our script in chrome browser. Same for ‘safari’  and ‘internet explorer’. We can use two other keys with ‘version’ and ‘platform’.

Example : We use our previous project that we have developed in our previous post. Here we modify the conf.js file

Step 1 : Open the project and open conf.js file.

Step 2 : Add the following code for firefox browser. Note that chrome browser is by default for protractor. So we don’t need to mention it. If we implement firefox browser, we can add the following code in our conf.js file.

image

Now conf.js file looks like the following,

image

Step 3 : Now run the script by using the following command,

image

Note that we have to run Selenium standalone server before that.

When it starts running, opens the firefox browser and execute the steps.

If we want to run our scripts in multiple browsers at a time then we use multicapabilities object. For this we add the following code.

image

Now the conf.js file will be,

image

Now run the script. We see two browser window opens and execute the script. Note that we must have chrome and firefox installed on our machine.

In case of internet explorer, things are different.

Step 1 : Open the terminal and type the following to install IE driver

image

Step 2 : Add multicapabilities object to conf.js file like the following where browser name is ‘internet explorer’.

image

Step 3 : Run selenium standalone server.

[image71.png]

Step 4 : Now run the script by using the following command,

image

We see IE browser window opens and execute the script.

In our next posts we will show how we can manage it other ways.

Happy UI Testing with Protractor!!!

Cypress: How to handle browser-based authentication pop up dialog in Cypress

Five years ago I have written a blog on how to handle browser-based authentication for selenium webdriver.   Now it is for cypress. Cypress...