Showing posts with label Cross Browser Testing. Show all posts

Saturday, September 12, 2020

Cypress: How to test a web application using Cypress

In the previous posts, we have discussed various features of cypress and the installation procedure. 

Here we will see how a sample test can be written and execute the test using a  cypress test runner.


Test case: Search with the text cypress on Google.


Steps:

  1. Go to Google.com

  2. Type the text ‘cypress’

  3. Click on the Search button

  4. Verify the text “JavaScript End to End Testing Framework | cypress.io”


Now start automating the script.


Create a project structure: 

  1. Open the folder using the visual studio code that I have created in my last post in order

to install the cypress application. Note that I am using visual studio code as the editor for scripting.
You can use any editor that you feel comfortable with.

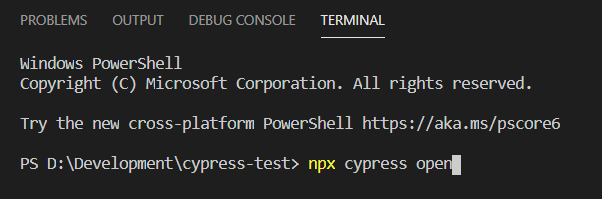
  1. Go to Terminal->New Terminal to open a new terminal.


  1. Type the following command to create a new project structure.

npx cypress open


  1. It will create a cypress project structure. 


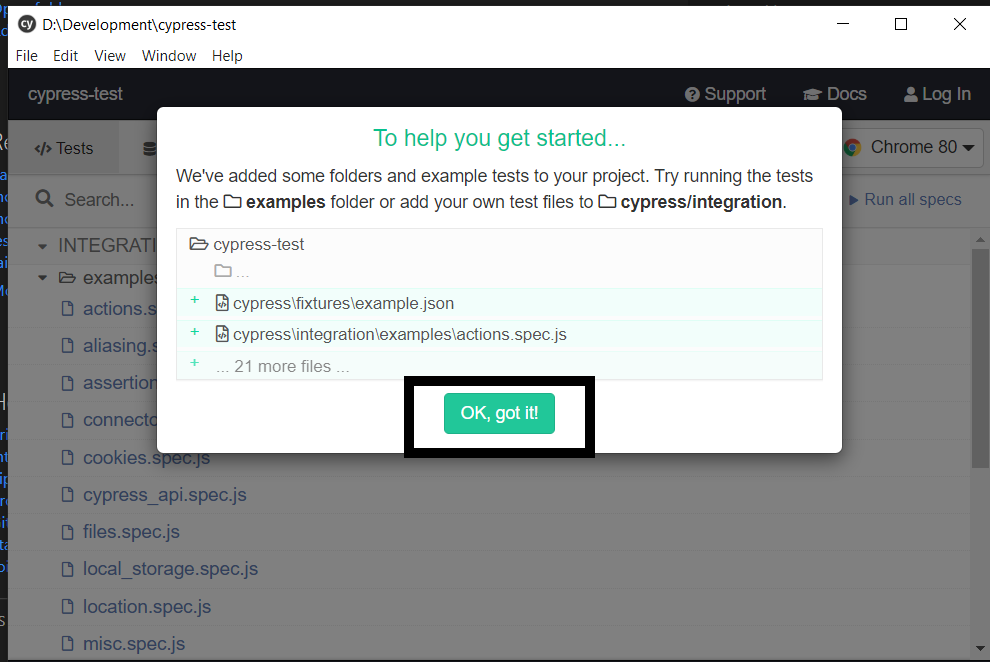
  1. Click the OK button and the project structure has been created 

  2. Cypress Test runner window is now opened and click the close button to close the window.

  3. The project structure looks like the following.


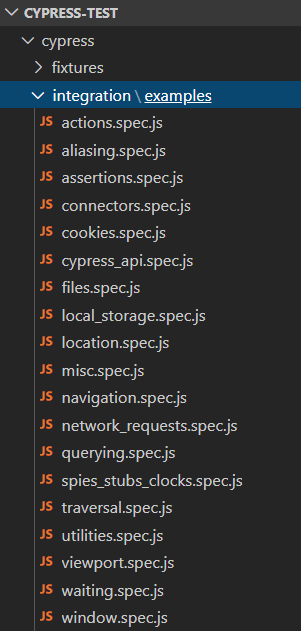
  1. Now expand the cypress folder and see the structure.


  1. There are four folders.

    1. fixtures: All the test data files are there,

    2. Integration: All the test scripts are there.

    3. Plugins: cypress plugins are there.

    4. Support: all the customized commands are there.

    I will discuss the project structure in a separate post.


Writing Test:

Now come to write the cypress test. 

  1. Expand the Integration folder and note that a folder named “examples” are displayed.


  1. Now delete that folder as it has some sample scripts and it is not needed now.

  2. create a new test file name cypress_test.spec.js


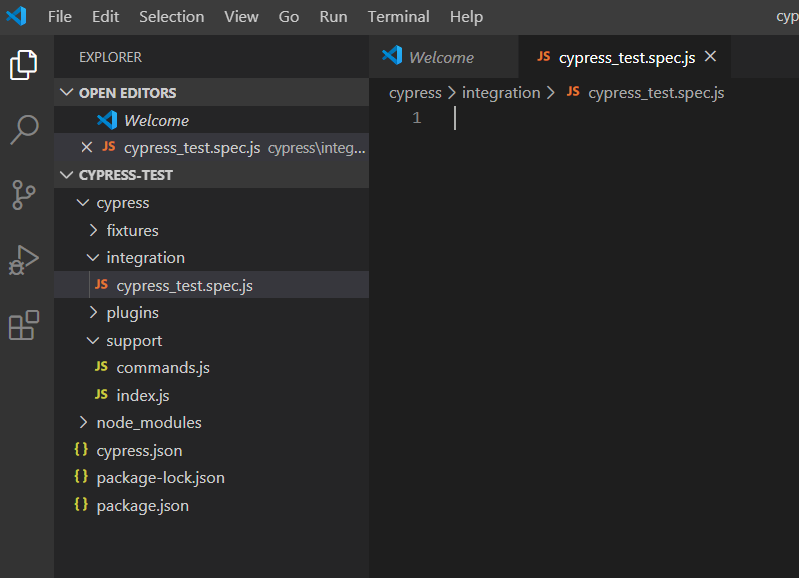
  1. Write the following script 


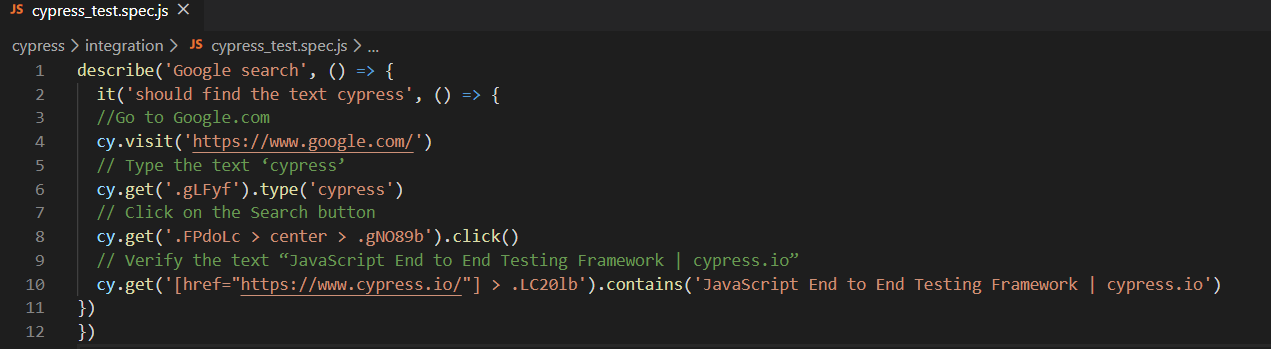
Note that we use describe..it blocks. As cypress is using mocha by default, it uses this block.

cy.visit() : to visit a page 

cy.get(): for getting element location or searching an element

cy.get().click() : to click an element

cy.contains(): to check the text available on the page.


We will discuss more details on cypress API in later posts.


  1. Save the file.


Run the test using TestRunner:

  1. Open a terminal window

  2. Type the following command in the terminal.

npx cypress open


  1. It will open the Cypress test runner.


Now click on the cypress_test.spec.js file and it will start running.


Run the test in the terminal:

  1. If you want to run the cypress test in terminal, then just open the terminal and type the following

command:

npx cypress run


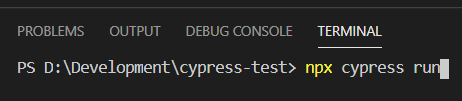
  1. The test will start running in headless mode and display the result.


That’s all for now. We will discuss more on cypress in my future post.

Thank you. 

Happy automation testing with Cypress!

Saturday, April 18, 2020

Cypress: An open-source front end tool for an end to end testing

Nowadays end to end test is becoming popular and tester are very much fond of these tools. 
In that case, Cypress is one step ahead due to its first execution of the test script. Scripts are written in 
javascript and no runtime server needed. 

It is an open-source and developer-friendly tool and builds from scratch and no selenium dependency.

According to cypress, it has the following features that make it different from other tools. 
  • For every step, it takes a screenshot. When you hover it shows a recorded screenshot.
  • It can automatically rerun when any changes happen in the script.
  • It has spies, stubs, and clocks like unit tests.
  • Since it does not use any selenium or web driver, tests result are consistent, reliable and flake-free.
  • Debugging is user friendly.
  • No waits needed. It can automatically start and stops when needed.
  • Network Trafic can be stubbed when needed.
  • Screenshot can be taken automatically when scripts fail. Also, video can be recorded for the whole steps.

In my next post, I show how cypress can be installed and a simple test can be run. 

Welcome to the Cypress world!

Sunday, April 24, 2016

Protractor : How to run protractor script in different browsers

In our last post we have seen on how we can start our selenium standalone server using gulp. In order to perform cross browser testing it is needed to run our protractor script in different browser. Here we will see how we can do that by running our protractor script in different browser.

Protractor support four major browsers (Chrome, Firefox, IE and Safari).

If we use conf.js file to run our protractor script then we need to add Selenium capabilities object to our conf.js file.

image

Here capabilities is a json object to add browser name. Note that we have to change the browser name here to run our protractor script to our desired browser. If we use ‘chrome’ in place of ‘firefox’ then it starts running our script in chrome browser. Same for ‘safari’  and ‘internet explorer’. We can use two other keys with ‘version’ and ‘platform’.

Example : We use our previous project that we have developed in our previous post. Here we modify the conf.js file

Step 1 : Open the project and open conf.js file.

Step 2 : Add the following code for firefox browser. Note that chrome browser is by default for protractor. So we don’t need to mention it. If we implement firefox browser, we can add the following code in our conf.js file.

image

Now conf.js file looks like the following,

image

Step 3 : Now run the script by using the following command,

image

Note that we have to run Selenium standalone server before that.

When it starts running, opens the firefox browser and execute the steps.

If we want to run our scripts in multiple browsers at a time then we use multicapabilities object. For this we add the following code.

image

Now the conf.js file will be,

image

Now run the script. We see two browser window opens and execute the script. Note that we must have chrome and firefox installed on our machine.

In case of internet explorer, things are different.

Step 1 : Open the terminal and type the following to install IE driver

image

Step 2 : Add multicapabilities object to conf.js file like the following where browser name is ‘internet explorer’.

image

Step 3 : Run selenium standalone server.

[image71.png]

Step 4 : Now run the script by using the following command,

image

We see IE browser window opens and execute the script.

In our next posts we will show how we can manage it other ways.

Happy UI Testing with Protractor!!!

Wednesday, September 30, 2015

Protractor : What is Protractor?

Protractor is an AngularJS end to end (EtoE) testing framework used in automating AngularJS application. It has been introduced from AngularJS 1.2. It is a replacement of EtoE test framework ngScenario.

Features:

  • Protractor is built on top of WebDriverJS, which uses native events and browser-specific drivers to interact with the application.
  • Protractor supports Angular-specific locator strategies. It helps to locate angular specific element.
  • There is no need to add any wait or sleep statement. Protractor can automatically handle page loading time and waits for next steps until the present steps task is finished.
  • Protractor is a Node.js program built on top of WebDriverJS and Selenium Server.
  • It allows running test on remote addressed but need not to have the test file on server.
  • It has its own test runner.
  • It can use Jasmine or Mocha to run test suites.
  • It supports Cucumber test frameworks.
  • Protractor works in conjunction with Selenium to provide an automated test infrastructure that can simulate a user’s interaction with an Angular application running in a browser or mobile device.

In our next post we will show on how we can install protractor and run a protractor test on our machine.

Happy End to End testing with Protractor!!!

Friday, July 3, 2015

Sahi : How to install and run Sahi on your windows machine

Sahi is an automation testing tool to automate web application. It has excellent record and playback feature to record and run application. In our previous post we have discuss about Sahi’s feature. Here we will show on how to install Sahi on our machine.

Download Sahi: Sahi has a community edition as well as commercial edition. Here we download Community edition and install it.

image

  • Sahi Download starts.

Install Sahi: After finishing download, go to the installer directory and follow the following steps.

Step1 : Double click on the installer file named “install_sahi_v50_……jar” file.

image

Sahi installation wizard is displayed.

image

Step 2 : Click on Next button.

image

Step 3 : It shows the software list that will be installed. Click on Next button

image

Step 4 : License agreement page is displayed.

  • Select the options “I accept the terms of this license agreement”.
  • Click on Next button.

image

Step 5 : Select the installation path where Sahi will be installed and click on Next button.

image

Step 6 : Click on OK button.

image

Step 7 : Select the packs that we want to install. By default all packs are selected. Grayed packs are mandatory. Click on Next button.

image

Step 8 : Sahi installation starts.

image

Step 9 : After finishing installation click on Next button.

image

Step 10 : Shortcut selection page is displayed.

  • Select the option “Create shortcuts in the Start-Menu”.
  • Select the option “Create additional shortcuts on the desktop”.
  • Select “Current User”.
  • Keep the application name “Sahi”.
  • Click on Next button.

image

Step 11 : This is the last page of the installation wizard. Following messages are displayed.

  • “Installation has completed successfully”.
  • “An uninstaller program has been created in”. It shows the path of uninstaller file.
  • A button is displayed showing “Generate an automatic installation Script”. Click on this button will generate a automatic installer.

Click on Done button. Sahi wizard window will be closed.

image

Step 12 : Note that an icon is displayed at the desktop. Double click on the icon.

image

Step 13 : Three windows are displayed.

  • Sahi Dashboard : This is the main sahi dashboard window where the browser list is displayed. We can select any browser here to record Sahi. Generally all the installed browsers are displayed at Sahi dashboard. Sometimes it might not be displayed due to installation path issue. We will submit a separate post on this issue.
  • Sahi needs to change browser proxy settings. For this it shows this window. Clicking on Continue button will close the window. You can close sahi clicking on Quit Sahi button.
  • Sahi Command Prompt : This window displays error message if there is any error happens. It also displays Sahi run status.

image

In our Next post we show on how to automate a web application using Sahi.

Happy scripting with Sahi as a Sahi manner…!!!

Sahi : What is Sahi?

Sahi is an automation tool to automate web application. It has both open source and commercial version. It has easy record and playback feature.

Record & Playback : It has an easy record and playback feature and it can automat any web application. It is easy for a non technical tester to record.

Cross Browser Testing : Script recording in one browser can run on other available browsers. So it supports cross browser testing.

Web Element Identification : It can locate elements very easily with its on build API. Also it can locate any dynamic ID without taking help on Xpath or tools. It can automate application built in using ExtJS, ZK, Dojo, YUI or any other framework.

AJAX : Sahi can automate web application built it AJAX. It does not need to use any Wait statement.

Rich Inbuilt Reports and Logs : It supplies complete info of script execution. It can report the exact line of script that fails. It provides graph reports and end to end result. Reports can be customizable.

Fast Parallel Batch Playback : Together of multiple scripts can make a suit and it can run multiple script in one machine or multiple machine at a time. It can run from Command prompt and continuous Integration also.

Simple Powerful Scripting : Sahi Script is based on JavaScript. So it can use the power of JavaScript. It can call any Java code or library. It can communicate Databases, Excel sheets, CSV files for data driven testing.

Inbuilt Excel Framework : It has inbuilt excel where tester can write simple test case in excel file and it will execute the script using the excel file.

Wednesday, September 17, 2014

How to run Selenium IDE script in different browser

We can easily create selenium script through Selenium IDE and run those scripts on Firefox browser.If you have no idea about selenium script, please visit my other post on IDE (How to record and run scripts with Selenium IDE).
But in order to do cross browser testing we need to run the script on other browsers like chrome, Internet Explorer etc.
Selenium IDE has given a feature (that is still experimental stage) where we can run our recorded IDE scripts through Chrome, Internet Explorer etc.
Step 1 : Download Selenium Standalone server and Browser driver server
Download the selenium Standalone server from the location (http://www.seleniumhq.org/download/).
image
Download the Browser Driver from the following location.
  • Internet Explorer(IE) driver :
    • Go to the location (http://www.seleniumhq.org/download/).
    • Note that there are two different version for 32 bit and 64 bit windows. Click on the appropriate link (32 bit windows IE or 64 bit windows IE) according to your windows OS version (32 or 64 bit).
image
image
image
  • Click to download the latest chrome driver. Here I have downloaded version 2.10. But it might be more latest version in future release. Clicking on this link will go to the following page.
image
  • Click on the above selected link and download the zip file. Unzip the file and copy the EXE file to a single location where Selenium Standalone server and IE driver are located.
Step 2 : Configure Selenium IDE
  • Open Selenium IDE
  • Go to Options
  • Click on Options menu
image
  • Selenium IDE options window is displayed and click on Webdriver tab.
image
  • Now check Enable Webdriver Playback options
  • Enter the full name of the browser you want to run your script in the text box below the checkbox. For example, in case of IE, we need to type “internet explorer”. In case of other browser, we can enter chrome, android, firefox, htmlunit, iPhone, iPad, opera.
image
  • Click ok button
  • Now restart the Selenium IDE. A restart is required to enable and disable webdriver. By default this option is disabled at selenium IDE.
Step 3 : Run Selenium Standalone server and Browser driver server
  • Before running this server ensure that java runtime environment is already installed on that machine as this is required to run JAR file. If not then download it from specific location.
  • Open the command prompt by using admin privilege (Run as administrator).
image
  • Go to the location where the Selenium Standalone server JAR file located. In my case, this is C:\Run location.
image
  • If you want to run your script on Internet explorer then type following command where both Selenium Standalone server and IE driver will start running.
java -jar selenium-server-standalone-2.42.2.jar -Dwebdriver.ie.driver=IEDriverServer.exe
image

image
  • In case of chrome driver the command will be
java -jar selenium-server-standalone-2.42.2.jar -Dwebdriver.chrome.driver=chromedriver.exe
All of the cases the command syntax will be
java -jar seleniumStandaloneServerFileName.jar -Dwebdriver.BrowserName.driver=.BrowserDriverServerFileName.exe

Note that every time we run the selenium standalone server with the browser driver server.

Step 4 : Run Selenium IDE scripts
  • Open Selenium IDE.
  • Load the recorded script file.
  • Run the script.
  • Note that the browser will be pop up and start executing the script.
Selenium IDE script recorded through Firefox browser will now run through other browsers like Chrome, IE etc.

Please comment me on any error you found to execute these steps.
Happy Cross Browser Testing!!!

Wednesday, August 13, 2014

Running Selenium Webdriver script in different browsers

In cross browser testing, we need to run selenium webdriver script on different browser like Firefox, Chrome and Internet Explorer etc. In order to do that we need to declare the webdriver for different browsers.

Firefox:
There is a Firefox driver class at Selenium webdriver package.
import org.openqa.selenium.firefox.FirefoxDriver;
The driver declaration will be :
In Java,
Webdriver driver=new FirefoxDriver();
Internet Explorer:
In case  of internet Explorer, the implementation is different. You have to download the internet explorer driver server from http://docs.seleniumhq.org/download/ page at the section “The Internet Explorer Driver Server”. There are two version present for windows 32 bit and 64 bit version. Download your appropriate version and Unzip the folder and rename it and place it in a suitable place of your project. There is a single executable file on the folder in named “IEDriverServer.exe”.
We need to add a package for this IE.
(In Java)
import org.openqa.selenium.ie.InternetExplorerDriver;

In driver declaration section, at first we have to define the path where this file is located using setProperty() function that takes the browser specific driver name and downloaded driver file path as the argument.

System.setProperty(DriverName, FilePath);

Here DriverName is in format like "webdriver.ie.driver". FilePath is like “C:\\Development\\…….\\IE Driver\\IEDriverServer.exe"

So the implementation will be (In Java),
System.setProperty("webdriver.ie.driver", "C:\\Development\\IE Driver\\IEDriverServer.exe");

The driver declaration will be (In Java),
Webdriver driver=new InternetExplorerDriver();

Chrome:
In case  of Chrome, the implementation is different but almost same IE driver described before. You have to download the Chrome driver server from https://code.google.com/p/selenium/wiki/ChromeDriver page. Click on “Download Driver” link will go to download page where there are different versions of drivers are displayed. Download the latest version. Unzip the folder and rename it and place it in a suitable place of your project. There is a single executable file on the folder in named “chromedriver.exe”.
We need to add a package for Chrome.
(In Java)
import org.openqa.selenium.chrome.ChromeDriver;
In driver declaration section, at first we have to define the path where this file is located using setProperty() function that takes the browser specific driver name and downloaded driver file path as the argument. So the implementation will be
(In Java),
System.setProperty("webdriver.chrome.driver", "C:\\Development\\chromedriver_win32\\chromedriver.exe");
The driver declaration will be (In Java),
 Webdriver driver = new ChromeDriver();
After driver declaration, your webdriver script will be same for all the three browsers.

In future post, I will describe on other browsers like opera and safari. Thanks !!


Cypress: How to handle browser-based authentication pop up dialog in Cypress

Five years ago I have written a blog on how to handle browser-based authentication for selenium webdriver.   Now it is for cypress. Cypress...